WARNING: Veeery long post :-)
Have you heard about the charity Siblings Together? It's such a worthwhile cause. Sometimes, when children go into care, families are split up, as one foster family cannot take all the children. Sadly then, it happens that these children hardly ever see their siblings. The Charity Siblings together (THIS is their website)provides for summer camps, where the children can have a lovely holiday together with their siblings.
Some time ago, Lynne (of Lily's Quilts) got involved as she thought it would be so lovely to provide each child with a quilt they can use during the holiday and then take home as a permanent reminder. She wrote this post (HERE)with a call for quilts to be sent and many people sent a quilt (or two :-) This is my post about the quilts I sent.
However more holidays, more quilts are needed and so we (on the Sibling Together Flickr group) have formed several 'Sibling' quilting bees. The bee mama of the month provides a tutorial to a block and all the other bee members will send a block to her. The mama of the month will assemble the top, provide the back, sandwich, quilt and bind the quilt ready to go off to Siblings together. So we all have our block to make each month and one of the months a quilt to finish. This should leave us with 12 quilts total in the bee to present to Siblings Together in a year.
I have the honour to be the first bee mama for June of our bee. In London last year,at the show and tell this beautiful quilt was produced. It was lovely and I believe also the result of a quilting bee. I do not remember whose it was so if anybody knows please let me know and I will give them credit!
Edit: The quilt was indeed a bee quilt for the Sew and Bee Happy Bee and made by Cindy at Fluffy Sheep Quilting(she has a blog and a shop). The pattern came from the Modern Quilt Blocks book (Here at Amazon) and the block is called Stargazing (page 178). The block Cindy used consisted of 3 sizes of wonky star in a block, I will order the book and have a look. Thanks Nicky for putting the name of the maker to this wonderful quilt!

I would really love to make something similar for the June Siblings Quilt and I am therefore asking for a few wonky stars from each of our bee members. The big and the small stars are all put together in the same way, so I will start with the tutorial for the Wonky Star;
Wonky Star Block:
The Wonky Star block is in fact a simple nine-patch block. For those of you who would like to read up on that or have a reminder, there is a good tutorial on this on the Connecting Threads Site. With the difference of course (as you will see in a minute)that we will be using 8 white or cream patches so the 'press to the dark side' becomes impossible and we will have to press to the white sometimes. But don't worry about that for now.
You start with 9 squares (the size of which determines the size of the star, more on sizes later). For this tutorial I have used 9 squares of 4 1/2" sq.

I then cut some triangles (mine were a 4 1/2" sq cut diagonally in half as it was easy to cut several layers in one go, speeds things up!) but you can use any sized scraps you like as long as the line where the base of the triangle is sown onto the white square, is straight. The rest gets trimmed off later. Here I have 'auditioned' the fabrics to see whether I liked the colour arrangement. On most I have overlaid two 1/2 squares per white square but on the bottom I have not quite finished (one 1/2 square to go) so you can see more easily what I have done.

We are now going to sew one of the four blocks that represent the wonky star bits. I have isolated one of them, the other three are done in the same way.

You deal first with the first star point;

I will now go to another colour. I would say that is so you can see it better, but honestly, I forgot this step first time round so had to shoot some more photos afterwards, lol. Nobody is perfect ;-)
The light blue triangle (which is now purple..) is flipped over so right sides are together and sewn across the base line. You can make this as wonky as you like and the more the angle at which this is placed differs, the more wonky the star. Do be careful and flip it over and back again before sewing to see if the colour is covering all of the white square underneath because if it is not, you will have to unpick it later.

Cut off the little corner if you remember, as it will make the quilt too bulky if you have a lot of places with 2 layers.

After which it looks like this;

Ok, back to the blue colour (but still the same actions). You have now sewn your triangle to the white square. Fold it back over the right way and press.

Now you are ready to overlay the other triangle and audition the angle (be sure to fold back and see if it's ok before you sew, can't say it often enough! you guess who has had to unpick a few of those in her time...)

Sew it on;

Then trim the corner off (as before) fold back and iron. (yeah yeah, I didn't before taking the photo..to tell you the truth, I am sewing on the first floor and the iron is downstairs in the kitchen so I cheated.. but really ironing every step gets you better results)

Trim the block to size;

Do this on all 3 sides that overlap so you end up with the original white square and some neat points of the star.

Lay out the blocks into the original nine patch and separate into 3 rows;

Sew the top three, middle three and bottom three blocks into rows and iron. (Here the ironing is very important, as the top row has to be ironed in a different direction than the middle row, then the bottom row same as the top. e.g. top row all to the left, middle row all tot the right, bottom row all to the left again). The correct ironing should mean that you are able to connect up the three rows beautifully because the seams ironed to the right 'butt up' to the seams ironed to the left so you get perfect junctions. (the tutorial mentioned above from the Connecting Threads website, explains this much better than I can).
Once the three rows have been sewn together, your block is finished and you have a star!

How many do I make?
You may ask. Well... Lynne was talking about any size, square or other, up to about 80"sq. I have roughly drawn out the 80" one in squares of 10" and it so happens that if we all do about 20" Sq, we would end up with a quilt of rougly 50"x80"

That would be a good size, or if somebody would like to make a few more, we might make it square. You can never have too many as any overflow could be used on the back.
Using squares of 4 1/2" will make a star of 12 1/2"
Using squares of 3 1/2" will make a star of 9 1/2"
Using squares of 2 1/2" will make a star of 6 1/2"
Edit: I have now bought the book "Modern Blocks" that Cindy used and the stars in there have 3 sizes, 1 1/2, 2 1/2 and 3 1/2 square for each square of the nine patch. Those are then put together in a 3 star block ending up at 20". However, still happy to receive any size and I will make them fit! For copyright reasons I cannot post part of the book here (you will have to buy it :-) but it anyone is stuck (or wants to do Cindy's block), email me and I will talk you through any problems.
I would like you to make stars of different sizes (you don't have to keep yourself to the three above, they are just the most usual sizes, you can go smaller...), so that when put together in a block later, the surfaces of the stars together would approximately total 20"square. It doesn't matter which sizes you make, some would maybe like to make the bigger ones, others fancy more smaller ones, as long as we don't all only make big ones :-)
You may sew them into a block, but I am also happy for you to send the stars by themselves and I will arrange them in a nice arrangement, that might have the advantage that if some are more red and some more blue etc, I can spread the colours a bit but I am easy, what ever you like.
So when you have the hang of doing these, you will find that they come together quickly and easily and they are a great scrapbuster.
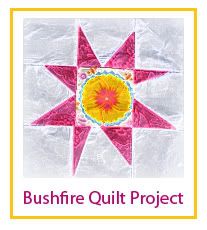
I first came across them when Tia (Campfollower Bags) was heading the effort for the Bushfire quilts (Flickr group here) in summer 2009. I did a combination quilt then with hearts and stars which Tia kindly sandwiched and quilted over in Austraia. You will find that one, and a LOT more star quilts all on the Flickr site, although these were mainly done in one size star. I did however think that the quilt in London with the different sizes came out really lovely so if possible, I would like to try something like that.
You all still with me? Phew....
Best of luck and I am looking forward to getting all the blocks! Thanks Teresa for letting me be the first bee mama. Can't wait to see what I get back! (There is also a post in the offing about another star quilt... she said mysteriously, -although my regular readers might remember what that is all about- but that is a story for another time!!)